As summer filtered away into deepest August, Rod from Carson City, Nevada decided to do something about a lingering idea. His used jeans pile had grown to 15 after going through his right knee at least as many times and he had been searching for someone to, in his words, “assemble them into a quilt versus discarding them.” Cue the vast and wonderful interwebs, which led him to my email.

I wish I had taken a picture of the box – maybe 18 inches square and 26 pounds (according to the UPS label)
And so it was that come fall, I opened a box to find multiple Levi’s (size 34-32), Lee, Kirkland (the Costco brand – thanks Lori!), GAP (relaxed fit), and Joseph Abboud jeans. Rod’s jeans were all retired around the same level of wear (right knee out of most, left in some), some with dark brown spot stains (Rod guessed paint, or maybe blood? He’s a hunter), all neatly folded. The charge at this juncture: pattern ideas for Rod choose from.
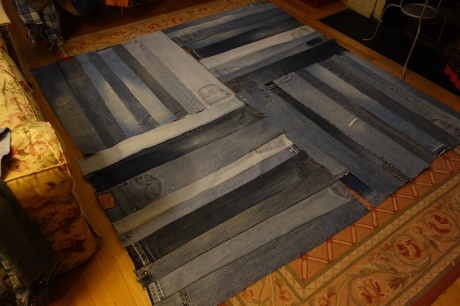
This random arrangement of legs in rows reminded me of a Diamond in the Square wall hanging I made a few years ago
and I wondered if this quilt style would work in this setting. After checking with Rod (and marveling yet again at the trust people place in strangers), it was a go for my first Denim Diamond in the Square.

At least the math was relatively easy. I went for the longest strips given the 32″ inseam. Placket-narrow wouldn’t work here, but 3-5 inch widths seemed about right.
I cut sections for fade, wear, stain spots, and pockets until there were enough for four quadrants.
This looks nice and orderly, but after the cut …
… it looks so much livelier. And now for the fun, or paradox, of quilting … sewing pieces back together
This takes time: two triangles are placed right side against each other, care is taken that seam presses are all laying in the right direction, then sides are pinned together to hold through the machine
I don’t know how well pictures and words convey the literally painstaking (needles, knees on the floor) nature of this process, but it’s a good example of how a word like “painstaking” arose in our shared language
As the whole grows in size, it pays to carefully fold it up at each step both to keep it straight and facilitate feeding through Modest Machine.
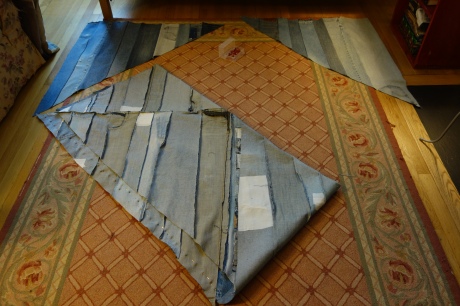
My workspace isn’t big enough to lay out a project this size, so I walk back and forth, project in hands, from my college son’s vacant room to my workspace.
Unfortunately for my knees, this tedious work is best not interrupted because the concentration and resulting work quality might not return in matching levels. So I keep at it until all sides are done.

For everyone who asks me how long a quilt takes: sewing these eight triangles together took about four hours.
Quilt folkways generally call for a border around a design, so it’s time to confer with Rod. He agrees with my recommendation of a simple “strip” border, and so I paw through the pieces that remain. This turns out to be a good way to deploy the decorative potential of all those jeans pockets.
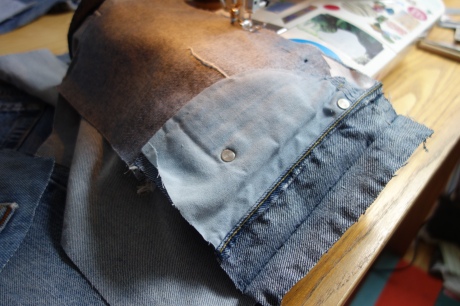
The pocket areas add visual interest, but a look at the underside shows all those layers that complicate sewing and make jeans a difficult clothing item to repurpose
I probably spent more time than absolutely necessary selecting pieces for the border, but this part of the process was fun, and I was seeking a feeling of balance
Joining, sewing, and iron pressing continues until the border lengths surround all four sides, which means the quiltop is done
Now for a quick review of the end process that returning Patwig readers may recall:

Backing is placed right side down on quiltop and layers are pinned together around perimeter, leaving 12-18 inch opening on one side

And it’s back to Modest Machine for sewing twice all the way around. I’m feeling kind of just-shoot-me-now at this point.
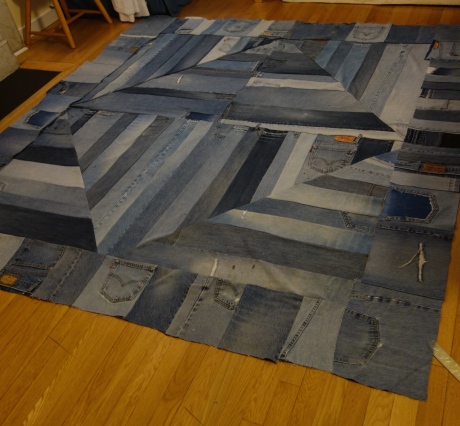
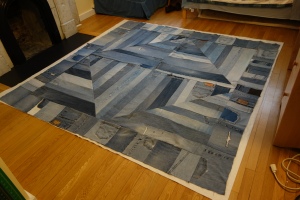
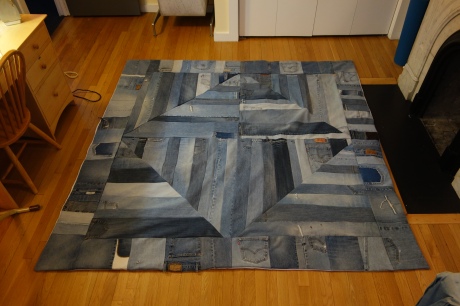
Until that’s done, and I’ll leave off the last tedious details to show the finished quilt …
….and with this view I appreciate it much more, and the work it represents. I hope Rod from Carson City is enjoying its use, and that you enjoyed reading about its creation. Thanks for reading to the end. If you want to be sure to see more of my projects, scroll down and hit the Sign Me Up! button to subscribe, and when I publish it will come to your email automatically.





Hi Pat,
I’m so impressed with your talent and patience! The quilt is beautiful and I really enjoyed reading the process!
💜
Lori
Ps the Kirkland jeans are Costco’s house brand!
Thanks for the correction Lori — I’m a BJ’s gal myself didn’t know about the Kirkland brand.
Best,
Pat
Impressive!!
Keepit up!
deborah
How wonderful Patchwork pattern! Thank’s so much for the step by step pictures! The men’s shirt quilt is absolutely beautiful!
Have a nice Day!
Rita
Thank you Rita … and I enjoy the color and form in your lovely crochet work!
Loved seeing this great jean quilt AND the pretty scarf flower rhinestone wall hanging.
Thank you Roxanne!