Archives for posts with tag: quilting with used clothes

When we left off, I was in creative retreat so I could work in an unhurried, peaceful environment.

img_2610

Wawayanda Lake, NJ

I had no particular plans, just a lot of materials.

img_3224

Back, or “patch” pockets

After making perhaps 10 denim quilts over two years, I’ve amassed collections of parts.  I’m inspired by that which seems unusable, like buttons and zippers.  Buttons are a lot like coins: they’re weighty, pleasingly embellished, and in accumulation create a treasure chest effect.  Eventually having them around resulted in this

img_1850

I’ve also been accumulating inside front pockets

img_2731

and discovered that these not-quite half moon, not quite quarter-circle sections of denim on plain cotton make a nice composition on their own …

dsc08619

as a four point star.

img_2730

With this inspiration, I found myself joining together as many as I could.  It was not especially easy or fun.  I wanted the watch pockets and rivets in there for texture and variation, but this upped the difficulty ante, so that needle heartbreak waited over every pass.  Modest Machine gamely grinded over the varying levels of fabric density like a mower over a dry rocky lawn.  Eventually a payoff came in visual impact as they multiplied.

dsc08616

Since the jeans and pockets were different sizes, the resulting star squares went from small to large.  Dipping into my denim stash, I gave each a wide border, adding tonal variation with different fades.

img_2746

Staggered, the borders gave a sense of movement to the stars, but I chose to collapse them into an overall square.

img_2763

I wanted to use as much of the original source material as possible. Lots of lining remained because of the emphasis on denim thus far.  Usually the back of a quilt is a simple muslim or sheet … why not piece all the pocket scraps together?  It would be smooth sailing for my little machine; the fabric was all the same weight.

dsc08618

So began another painstaking demonstration of the scrappiness of quilting

dsc08637

Why discard a piece with printing or graphics for added interest …

img_2825

Compositionally this part was more fun than the stars on the front

img_2801

And when it reached the size of the front piece

img_2817

I wasn’t sure which I liked better … each can stand (or lie) on its own

dsc08667

dsc08680

Completed July 27

If I had to classify it I’d call it a throw. When not thrown it folds up rather tidily. There is one more quilt I finished while on my peaceful retreat.  I’ll write about that next but will leave you with a summer sunset for now.

img_2806

July 26


A highlight of my summer was about 17 days (but who’s counting) at my lakeside weekend home in New Jersey.

img_2607

Evening, July 10

My husband joined me on the weekends, but the rest of the time was my own, and I used it as a creative retreat.  I had two cats with me, family nearby, some wonderful neighbors, and nothing but the cycling days and nights to fill as I wished.  It was bliss.

The weekend prior I brought up a bunch of materials

img_2599-2

I have been cutting up jeans, khaki’s, cargo shorts and more for 10 years.  In this time, my house has been blighted with clothes moths.  Enter Container Store.

As fabric is my medium, this is my method

img_2666

Modest Machine

Two items in my materials seemed to float to the top. My younger son (known as Chuck) recently castoff a pair of cargo shorts. My painterly friend Chuck gave me a canvas remnant scored with an island of red paint. These became my starting points.

dsc08565

img_2648

Using a seam ripper, I completely took apart the shorts, section by section.

dsc08577

Belt loops

Preparing the fabric is observational and contemplative.  Handling it I note its surface feel, weight, mobility. With each change in geometry and line I imagine new arrangements, and fabrics to enhance the bright red island. It takes most of the first day to take the shorts apart.

dsc08563

Waistband, cargo pockets, zipper fly, hems, and belt loops all give way to my seam ripper, lint roll, and iron.

dsc08564

These were well worn shorts. I’m not sure why they stopped returning value to my Chuck, but for me this new form is tremendously pleasing. I love its furry softness and the rippling gradations in the fade.

img_2654

The rabbit munching in the grass every day probably put me in mind of a red clover print in my stash, luckily in one of the containers I brought along. These were from a pair of jeans (pocket lining) I wore in the long long ago, before children. Turns out this is why I saved them.

dsc08566

At some point in my process there’s a shift from taking apart to putting together. In this case it was when I noticed the pocket flaps had clipped corners. Modest Machine roared to life to attach pocket lining to create 90 degree angles. I’m enjoying now how they look like old fashioned photo mounts.

img_2661

I still felt one more element was needed for the composition.  Some painted denim from my inspiring friend Chuck seemed to fit, with its grey and blue hues

img_2660

Then in a pretty continuous flow Modest Machine and I joined the elements together

img_2659

Surrounding the center island atoll

dsc08587

Buddy checked frequently for surface feel.

dsc08593

Until it was done (about 22 hours, but who’s counting), and as close to square as I’ve ever come with a quilt.The border includes a jeans leg where Chuck painted a blue rectangle.

img_2705

That’s Chuck Squared. Backing is an old sheet. The fill, as always, 100% cotton batting, as this is a small quilt/blanket/throw.   Coming very soon a post on the project that came on the heels of this one. Let me know what you think in the comments, and here’s your bonus shot for reading to the end!

img_2627

The deck at night, July 11


Levi's backside = icon

I love denim.  I love it new and deeply saturated, I love it softly threadbare.  I love the gradations of blue.  Perhaps as a child of the 70s I just have jeans in my blood.

A recent Sunday found me and my quilts at Greenflea market on the Upper West Side in Manhattan, where an amiable man named Donald stopped to look at the quilts on the table and the fence.

The patchwork in the foreground is made from jeans, khaki's, canvas shorts, and upholstery samples

The patchwork on the table in the foreground is composed of jeans, khaki’s, canvas shorts, and upholstery samples

“If I gave you a bunch of jeans could you make me a quilt like that?” he asked.  This is music to Patwig’s ears.  I truly enjoy giving new form to clothes that would otherwise be discarded.  And I like the surprises and challenge in coaxing something from a given pile of cast-offs.  A few emails later I had these on my worktable.

7 pairs jeans and cut-offs and 14 legs

Seven pairs of jeans and cut-offs and 14 legs, most blue and black, with one pair of corduroys and one pair of white denim in the mix.  Donald wanted something that looked like the finished quilt he saw at Greenflea, but with a uniform border, for which he provided a yard-or-so of soft blue fabric.

One of the tricky bits about working with clothes, because of their shape and the need to cut unusable parts away, is that it’s not always clear how much is needed.

The legs were readily arranged

Donald wanted the finished quilt to be 75 x 80 inches

A quick arrangement of these cut legs helped me eyeball that there would be enough material to achieve the desired size.  So I paired up pockets from different pairs of jeans.

Probably because I started with a grid-ish structure, I alternated colors

Definitely needed to keep those iconic Levi’s tags

Some of the pocket areas were quite worn, so I repaired them with a bit of fabric underneath and a zig-zag stitch

This piece looks like it might have an ink stain in the rear right pocket.  Remember when we used to carry pens in our back pockets?

After much arranging and contemplating, I sewed until there were several rows, a beginning for the center of a queen bed.  I thought this a good time to check with Donald to see if I was barking up the right tree, so I emailed him a picture of what I had so far.

DSC01163

He said it looked OK, but a bit boring, given the orderly grid.  He also wanted more emphasis on the blues and less on the orange and white, which made up the majority of the piece so far.

Dear Reader, I wanted to do better than OK and a bit boring, so with his blessing I cut it up again.  Then the project really opened up – it would be orderly no more …

I had been emphasizing the pockets, now I added it more plain blue legs, which offered their own variety in the form of worn knee areas

I cut to maximize blues

With so many of my "rows" ending with the top of the jeans or other particularly thick spots, I ended up sewing the rows onto backing pieces

I resewed pieces back at angles, joining sections with smaller strips of non-blues

I cut the original section out at angles, varying the row widths

The angles varied the row widths

I increased the length of the rows by adding in a couple of stripped sections

I increased some rows by adding two strip sections, including a button fly strip.

With a lot more movement in the mix, my focus turned to getting the size right.  The goal was 75 x 80, and the fabric Donald provided would yield a 6 inch border.  So I had to close the gap between the center above and the planned outer border.  Scrap time!

Cuffs often get frayed, which gave me a start on opening up those bottom seams. The worn areas resemble a sort of tie-dye pattern

Frayed cuffs start openings in the bottom seams.  Fully opening the hem triples the width of workable material and reveals a sort of tie-dye pattern

Strip borders are quick to compose and sew and, most dear to me, reduce waste.  Less goes in the garbage can

At this point there was fabric laying around everywhere

I laid the cut bits out until I was sure there was enough to go around

DSC01235

A row at a time is sewn together, pinned to the center, then the whole piece is folded up, ready for Modest Machine

Joining pieces

Though I used needles sized for denim, Modest Machine still broke 3 teeth on this project

One row at a time sewn together, sewn to the center, and trimmed

After rows are sewn to the center and pressed, they are trimmed at the sides with the rotary cutter

Each time I lay the quilt down I risk losing it to this resident

Each time I put the quilt down on the floor I risked losing it to this household resident

The blue fabric Donald wanted for the border was the last part of the quiltop

Once all 4 strip rows were done it was time to add the blue border.  I think it frames the active center well

This part of quilt making is physical.  Down on the floor, crawling from side to side while straightening, smoothing, pinning, and folding, then up and down the hall to feed carefully through the machine, sticking myself with pins multiple times along the way, then back to the floor, unfolding and doing it all again.  Knees, back, ankles, wrists — all recruits to the effort.  No wonder whole groups of women made larger quilts before labor saving devices were available.

Only once the outer border is done is it time to turn the quiltop design into what we know as a quilt.  That starts with batting

Quiltop done, it's time to actually turn it into what we know as a quilt

Batting is a layer of pure cotton fill which gives a quilt its warmth

The batting is placed on the floor and smoothed out

On a flat surface, batting is placed down.  I have trimmed it to just over the size of this piece

The quiltop is placed on the batting, right side up, smoothed out, then a single layer of backing is added.  Sheets work well for this job.

The backing -- Wendy's sheet -- is the third layer

Who knows what calculus goes into such decisions, but luckily for me, this baby blue in very good condition was retired from its household bedmaking rotation, donated to me, and perfect for this quilt

As well as being physical, the end stage of the process features craft and precision.  It’s not especially fun.  I’m always concerned that I’ll seriously mess something up and all will be lost.

once pinned together, again I fold it up and bring it to Modest Machine.  For this I sewed around the perimeter twice.  Because of the smooth surfaces -- compared to the bumpy layers of denim -- it goes smoothly, with no broken needles

Now for the final two rounds around the perimeter joining all three layers

Once turned inside out, pressing the edge seams is necessary to establish the edge

Once turned inside out, pressing outer borders is necessary to establish the edges.  I do the first part on my ironing board then, you guessed it, back to the floor

Because of its size, ties will help keep the layers from shifting around.  I've got this old spool of needlepoint thread -- I think it was my mother's or grandmother's -- and it matches the corduroy perfectly

Simple ties will restrict shifting from the weight of the denim. This old spool of needlepoint thread — I think it was my mother’s or grandmother’s — matches the corduroy perfectly

As I go through my photos while writing this post, I realize I don’t have one overall picture of the finished quilt.  What I do have are these detail shots,  which is what I liked most working on this, the juxtapositions of various bits of old jeans.

DSC01270

DSC01271

DSC01269

DSC01263

DSC01268

DSC01265

You made it to the end!  Hope you enjoyed this scroll through my quilt making process.  Please feel free to share/link/forward Patwig’s Blog with anyone you think may enjoy it.

I’m not sure when or where it was, but at some point I was lucky enough to see Ellsworth Kelly’s Colors For a Large Wall on a wall, in all it’s pristine, elemental squareness, with colors stacked boldly in perfect certainty.  And I, in my complimentary simplicity, thought, that’s a great quilt.

So I gathered from my stash matching solid colors (except a purple, which I didn’t have a close-enough, so I threw in a lilac batik) for a homage to Kelly’s work.  I thought it came out a little flat.

Lacking some luster

Later I added yarn ties; I think it looks better here, without

Apparently the lesson of Kelly’s architecture needed time to percolate.

Since I make quilts from old clothes, I need to cut them up before I use them.  I don’t necessarily use all these cuts for whatever project is at hand.  I always seem to be cutting a lot of shirts, and began to save the shirt pockets. They accumulated.

Because you never know

I think there were 65 or so

Recently I got them out, and began to play

There's something pleasing about these orderly rows

Started on the worktable but there wasn’t enough room

I like this rug for this purpose because the inner bordered area is about 4 x 6 -- giving me a guideline of how big I'm getting

I knew I wanted a nicely stacked square, like CFALW

I knew I wanted the orange in ...

Colors interact, as do pattern and texture

Working on the floor does have its hazards ...

Working on the floor does have its hazards

Until

I was looking for balance

Certain colors drive other color choices. The brilliant pumpkin orange (two buttoned shirt pockets see above — thanks Nancy!) led to the inclusion of this playful green patterned print which I had forever but hadn’t found a use for

Color text on the shirt:  Full of mischief! and Good Times!

Bright text reads “full of mischief”

Some pockets I included because I liked their elegant insignias, and some for their weighty, tweedy feel

Modest Machine

Modest Machine still by my side

Eventually I settled on an order for the rows

Seven rows of seven pocket squares

Seven by seven pocket squares

And since I’m never too fussy about lining up my points

I am careful with my pinning

I am careful with my pinning

The top came together quickly

All sewed up

All sewed and pressed

Because the shirts emphasize fall colors, it seemed fitting to wrap a warm brown flannel around the block design

feelsbetter

I finished this quilt in mid-September and brought it along to Greenflea Market where I put up my quilts on good-weather Sundays.  The first week it was out on a table and passersby stopped to put their hands in the pockets.  The second time I put it up on the fence.

DSC01052

I could call it Fall Colors for a Large Fence

Thanks for the inspiration, Mr. Kelly.

This story starts with two little boys living in the Midwest.  In addition to being pretty lucky in the parent department (example of a house rule:  being read to is a right, not a privilege), they have an exceptionally dedicated grandmother, Sue.  Sue is very involved with her grandsons, but is understandably rueful her husband died before he could know them.  She wanted them to have something that would evoke him.  This is where Patwig comes in.

Sue contributed more than 35 shirts for this project. After I cut up the first bunch (the stack in front) she sent more.

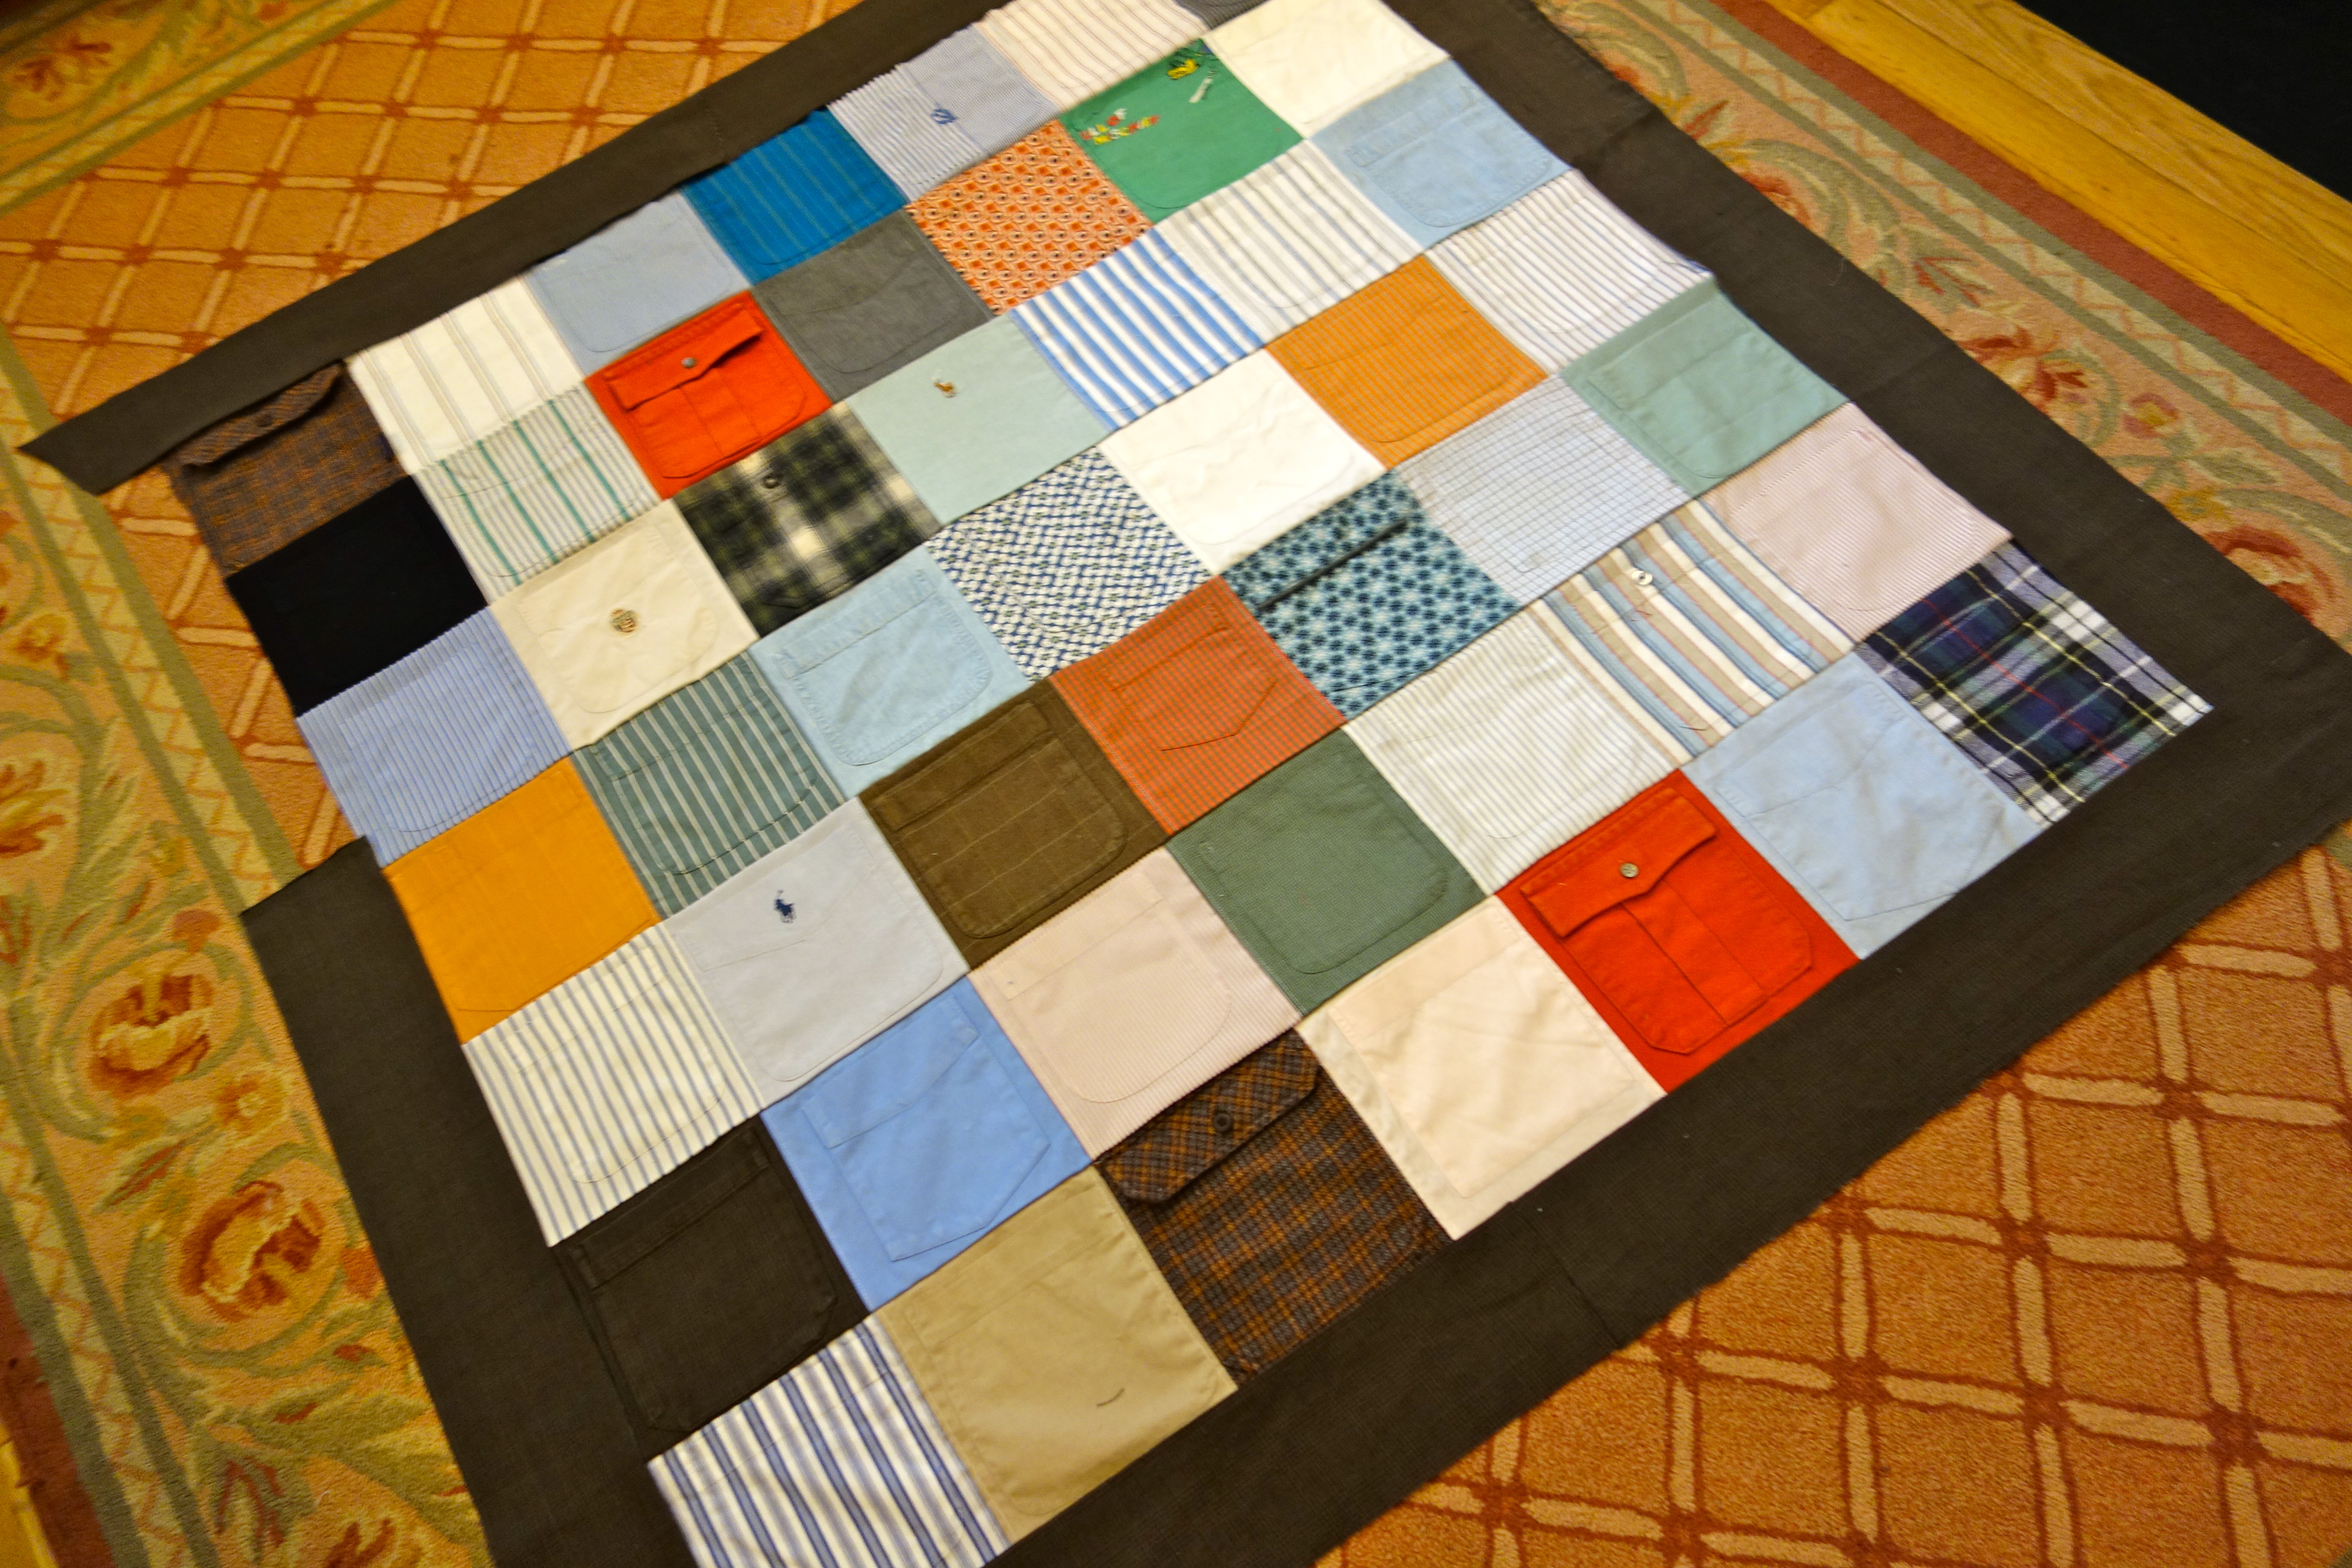
She wanted a twin sized quilt for each boy made from her husband’s old button-downs.  Some were standard white formal fare, many sported various hues of blue, with and without stripes, and a few were appealing paisleys and plaids.  After seeing sample Patwig Quilts, she chose the Nine-Patch block pattern and the Log Cabin pattern, which I hadn’t made before.  That settled, she essentially gave me carte blanche to create, and I continued to be amazed at the trust people place in strangers.

Where to begin wasn’t hard to decide.

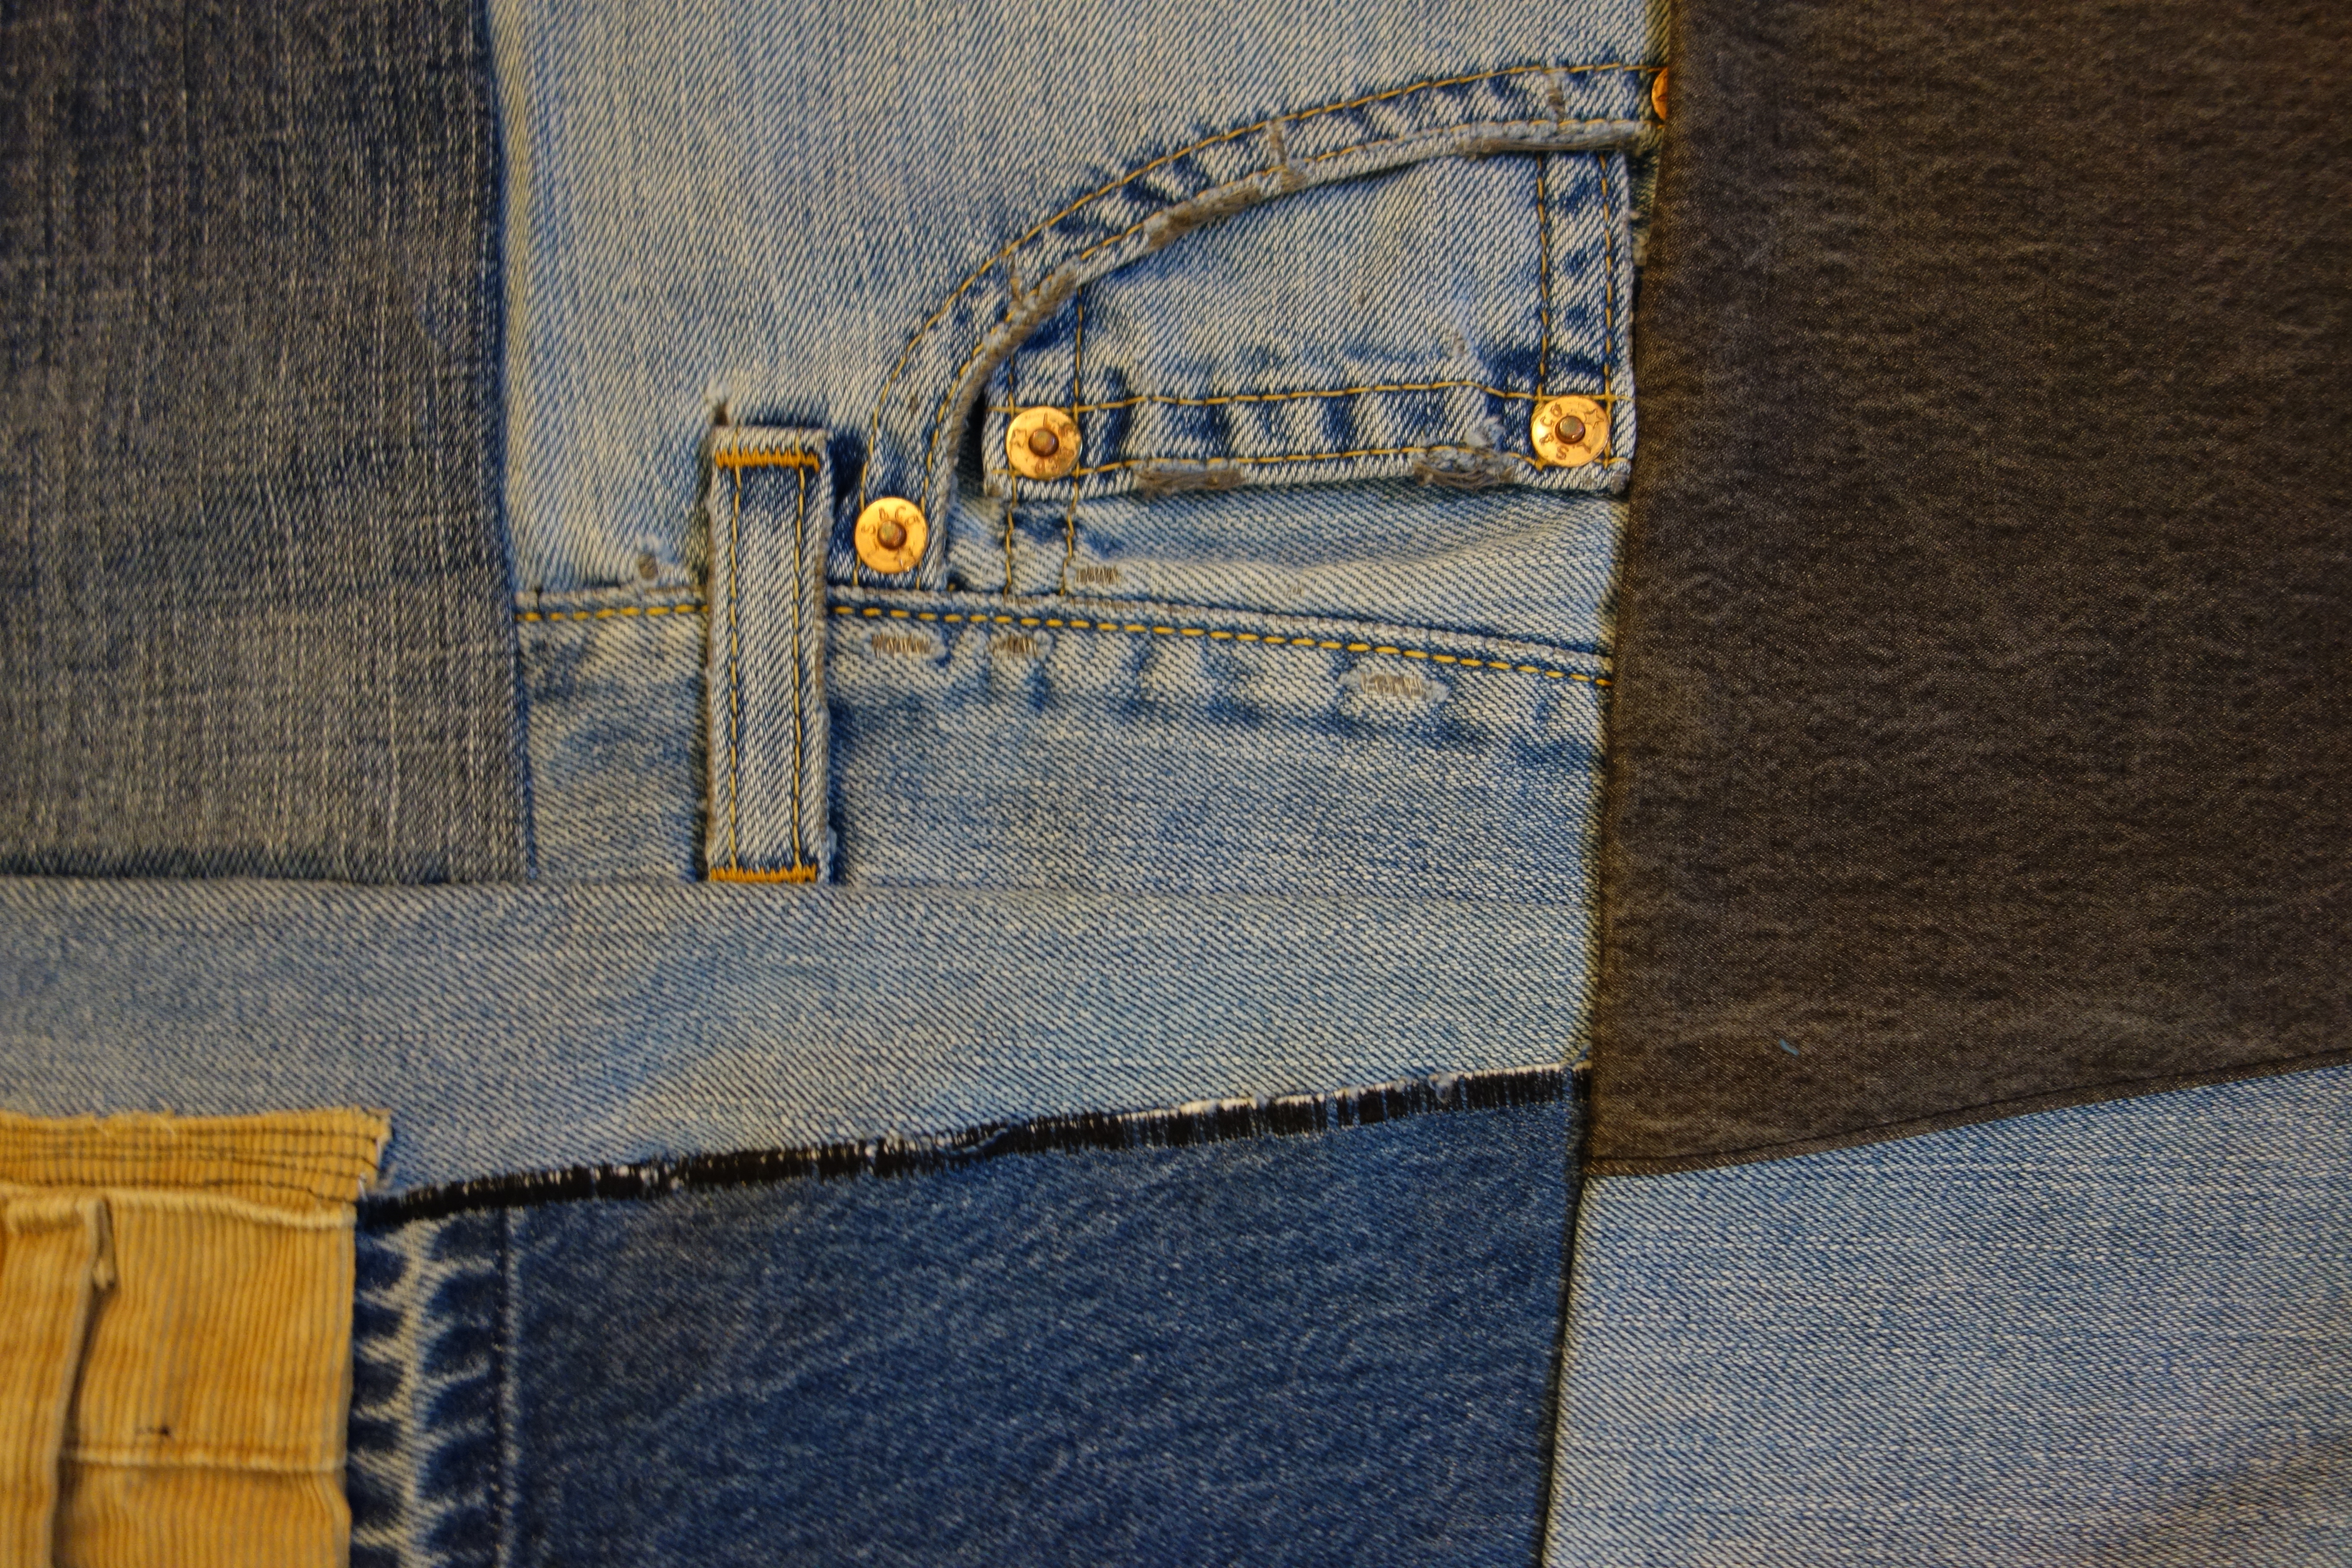
Log Cabin is a classic quilt block. A square sits at the center, (typically red), and rows of blocks are placed around it, one side light, one side dark.

I started with easy colors, as in the solid pairings above, and proceeded to more complex couplings, like the patterned lights and darks below

The red/pink and paisley here were among Sue's favorites

As blocks were completed I put them down on the floor to see light and dark create patterns.

The dark side is the strongest visual element here

I’d been working one block at a time until this point, and feeling assured that I was on the right track, shifted to mass production.  This meant cutting 17 squares, 119 light blocks, 102 dark blocks and backing all with fusible interfacing.

A rotary cutter and grid mat make this more efficient, but it still takes time. Music helps.

Once all components were prepped, I sewed them together and put them down on the floor

until I arrived at this…

"Diamond in the Square" is another classic quilt pattern

With the Log Cabin blocks done, I was ready to turn to the second quiltop.  Fortuitously, many cutting remnants offered a head start


The Nine-Patch ultimately required 567 two inch squares

Making the Nine-Patch was very enjoyable; each is an individual composition.  This is the part I truly enjoy.

Once they began to multiply, I line them up en masse to see what they would do

More hodgepodge than medley

Moving to the floor, I added space between them

Much more distinct this way

Then each Nine-Patch got a border, all from button-down shirts

Steady production continued — sewing, pressing, sewing some more, until 63 Nine-Patch blocks each had a pressed border.

"Cute as a button" is a little precious, but I think it fits here

I was enjoying this small form stuff so much I’d forgotten the bigger picture — how they will form a quiltop:

Back on the floor

Going for 9 rows of 7

Next time I'll wear knee pads

All down, random placement.

How about alternating light and dark rows?

We have a winner

This is the midpoint.  The primary design –the quiltop– is done.   The rest is, shall we say, finish work (albeit with a decorative border).  This is mostly assembly, but what it lacks in creativity it pays back in satisfaction as the finished piece slowly comes together.

Two stacks of quilt blocks

Individual blocks make a row, rows make a quiltop

I'm making more of an effort to get my corners "on point"

You can see the fusible interfacing on the backs here

A border brings each quilt up to twin size.  I made a strip border drawing mostly from the white and striped button-downs.

My son suggested adding more dark colors

After almost 300 two-by-seven inch strips were pressed, fused, sewn together and ironed, the quiltops are “framed”

A border on the Log Cabin really pops the diamonds out

This is my sixth Nine Patch quilt

Next up: batting (or fill) and backing.  Sue has provided two full-sized sheets for the backing.  Who can guess why this one has patchwork in the corners?

These sheets were repurposed twice: Sue had given them to a friend to use as drop cloths for painting before they got to me

Once the layers are sewn together and pressed (That sounds so breezy, doesn’t it?  At about 65 by 82 inches, it took about an hour to seam each twice), I hand tie them together with yarn (another afternoon) with a nice light blue yarn I picked up for a song in Chinatown

A tapestry needle works best to pull the yarn through the layers, finished with a double knot.

This work takes place on the floor, where helpers stroll

Ursula is the only one of our cats that goes after yarn

Finished, side by side

Congratulations to you for making it all the way through this!  I believe you are among a small, but attentive group of people.  If there’s anyone you know whom you think might make it all the way as well, please send a link to this page to them, or post on your preferred social media.

Next post will be a Patwig Scrap Project.

It’s inevitable that there will be scraps left over when a quilt is done, they’re the benched players on the sidelines when the buzzer sounds.  Wasted potential, because in my book, scraps an inch above standard seam allowance can excel in the right conditions.

So it was when Ellen came to pick up her quilt featuring her husbands’ Hermes ties.   We were completing our transaction on pretty upbeat terms – how lovely to have a happy client – until she saw the bagged scraps and the trace of a frown began to appear.  The goal had been to put ALL the fabric to use.  What could be done with these leftovers?  Then Ellen remembered  a little “study” I had made for her quilt

and suggested it for pillows — one for each of her four children, and one for her.  Eyeballing the scraps, I was sure there was enough for five, so we were in business.

After scoring polyester pillow inserts from P&S Fabrics in Chinatown (made in Massachusetts, BTW),

The triangles at left are the tie tips.

I spread out all the scraps.  Most were too small for use in the quilt, some were lining, and some were colors or hues that just didn’t show their best or add anything to the quilt as the design unfolded.   I ironed everything, added fusible backing where needed, and using the study above as a starting point, began to cut short bars to join into squares

I decided to use four sets of blocks on each pillow, sashed with the tie linings I couldn’t use the first time around

The bars of color echoed the coin stack pattern of the "mother quilt."

There were a few big pieces left

Hermes tie and a bit of Thai silk

which provided sashing around the inner block of four

I tried to get some Thai silk on every pillow, since it featured so prominently on the mother quilt

By this time the bits and pieces remaining really were not much more than that, so the outer border was literally “strip piecing.”

I sewed bits and pieces together until they were long enough for a border for each side of the pillows, 20 overall.

Ellen had provided a lovely blue queen-sized sheet for the back of the original quilt.  Enough was left to back the pillows.

The patchwork pillow front is 12 inches square. The back is two pieces of blue sheeting 12 inches wide by 7 or 8 inches, overlapping.

The pillow cover and backing are pinned, right sides facing together, and sewn all the way around the square three times.  The overlap in the backing creates a slit to slip the pillow in.

As I finished I stacked them up.

I’d been concerned that one or two might be “nicer,” stand out more somehow from the rest of the line-up …

But I think they ended up as a pretty strong team

*A soft cushion for your head or another part of your body, possibly featuring fabrics that remind you of a special person.

Last month my lucky stars (more accurately, a reader in a donating mood — thanks Lana) brought me a treasure trove of upholstery samples that were doing nothing in her closet:

All this filled two contractor bags

Many were 12 inch squares, some bigger.  Some I liked because of their color, some because of the patterns (many hydrangeas) and I quickly became excited as I saw how this one would go well with denim or that one with corduroy.  So cheering was this sudden abundance that I ignored the fact that my fabric stash had just increased exponentially.

I removed all the tags first to eliminate the staples -- I didn't want Modest Machine to break a tooth. Assuming the dates on the tags indicate date of manufacture, some of these were 14 years old.

As I sorted and bagged the bounty, I recalled a trio of denim throws made recently for a school craft fair.  The one that sold I liked the best, and this is the only picture I can find of it:

A 16-square center surrounded by a neutral and finished with a scrap denim border.

All this new upholstery suggested a remake.  I looked for pieces that would work with denim:

The rust color at left is very similar to the stain finish on a media cabinet in my home, a warm, rich hue

A patterned cotton offered a floral match:

This is an example of one of my favorite quilting terms -- "fussy cutting," in which a specific pattern or motif is cut without regard to maximizing fabric usage. Such practice is generally anathema to Patwig, but an exception is made here.

A bag of denim scraps from the last project offered a head start on the strip border:

But I don't have big enough pieces for the center squares, so it's back to cutting up jeans. Time to thank Wendy, who gave me an outgrown pair of her son's, and my husband, who parted with a faded pair of Levi's.

Assembling the inner section is rapid.  A simple linen/hopsack from the upholstery trove adds a needed neutral.

Four rows of four 7-inch squares

The denim border will take more time.  I like how these strips playfully suggest the fabric’s prior life:

I left the Levi's tag on at first, but it started to crumble when sewn through, and didn't take to ironing at all.

Once the quiltop is done, I enlist a piece of flannel from a massive old comforter cover:

A little of this color goes a very long way

These fabrics are so heavy I don’t need a lot of batting.  An old jersey sheet, previously repurposed into a turban for a school project, is just right:

I do love the angle of the sun this time of year

Once all layers are sewn together it’s ready for hand tying.  Since this has been a such a speedy project, I decide to drop time into some extreme repurposing … pulling apart the woven strands from some pillowcases my friend Matthew gave me:

When I machine washed these pillowcases the weave basically fell apart (it really is best to follow care instructions). The wreckage revealed that each cord was three twisted strands of thread, or now, quilt ties.

The finished product is a 38 by 38 heavyweight nearly 100% cotton throw.  It’s for sale, and if anyone’s interested, comment here or send me an email.   And stay tuned for more upholstery projects!

Now I’ve just got to use up the rest of that upholstery

This summer was the longest break I’ve taken from quilt-making since I started.  Maybe it was the effort of producing a queen-sized piece.  Or maybe it was having my kids around for summer.  Whatever it was, at some point I thought I should make a quilt for my mother.  She said yes she would like that, and this project ensued.

She wanted yellows, greens and browns.  I gathered stuff from my stash and she gave me a bunch of old fabric from her attic, including what I recognized as curtains that had been in her kitchen long ago.  There was also fabric from seat cushions she made for the kitchen chairs.  It was fun to see this in its original color saturation — compared to the well-worn cushions which are still there.  Best of all, there was a very cheery and flowery yellow bedsheet, the sight of which caused me to bury my nose in its familiar smell.  I remember going to her room early in the morning when she was in bed reading before my brother woke up.  I’d climb in bed with her and we’d talk or read and play shadow puppets with the light from her bedside lamp.  My mother’s bed is her refuge.   And it was the secure station where she hunkered down to sleep and wait out six months of radiation and chemotherapy to vanquish a soft-tissue sarcoma.  She cares deeply about what she puts on her bed, so I have been privileged to make a quilt for it.

Her instructions on a white slip of scratch paper include her classic "Q."

The pattern inspiration for this quilt is one I’ve done several times, the so-called Chinese coin pattern.  Ignore the unmade bed and you can see the basic pattern:  stacks of narrow horizontal strips (coins) alternating with typically a solid color background.

If the bed's not made as soon as it's vacated, felines will take advantage of any remaining warm spots.

From a production standpoint, this pattern moves along readily.

I googled to discover the origins of the "Chinese coin" but didn't find anything I felt was sufficiently authoritative. It is also called "strip piecing."

Selecting fabrics and grouping them together is the fun part.  I end up using a far greater percentage from my own stash than from those my mother gave me, and  I realize these may be unconscious choices recalling her fabric history.  For instance, the deep blue/greens below are nearly the same color as a fabric she used to reupholster a living room chair —  a project she never did finish, though the chair remains with a slipcover.

The blue-green was the lining for a toddler-sized jacket. There are also old pillow-cover pieces here.

I also sew narrower but longer rows for an outer border.   This should stand out nicely against the brown dust ruffle on her bed.

My son's bedroom floor is my surface for laying, arranging and visualizing. I believe some quilters use an "idea wall" but my workroom does not offer enough space to stand back and view.

Once columns are done, a background color is needed to highlight and divide them.  This offers the perfect application of those former kitchen curtains.  It’s not a solid, but the pattern is small and neutral enough to work in.

The warm hue of the curtain material puts me in mind of acorn squash. Or maybe it's a fall breeze in the air.

I like making ready progress on a project, but the bigger it gets the harder it is to move around.   After the alternating columns of strips and solids are sewn together, the solid is added to cap the top and bottom.

Wide borders emphasize the colors. I think a very dark color, like black, would also work well here.

At some point I discover that I don’t have a big enough piece of something to use for batting (or fill), so I make a quick run up to City Quilter.  This is the first time I’ve purchased any supplies for this quilt — thus far I’ve managed with all found objects.  This satisfies the thrifty part of my soul. Now it’s time to make a backing.  Cue the cheery yellow floral that brought back so many memories:

Yellows always remind me of my mother.

Careful readers of Patwig’s Blog may remember that the next step is sewing all three layers together — quilt top, batting, and backing (right side down) — leaving a small opening to pull the whole thing inside out.  After pressing, it is “fit to be tied.”

I usually hand-tie my quilts. For this I use a needlepoint thread which perfectly matches the acorn squash color.

Nearly there.  A quick check of photo dates shows this commenced August 5 with fabric selection, and sewing starting September 10 and finishing September 22.  After a quick look over by the resident inspector, it’s done.

Don't worry about soiling: Seymour keeps his paws and pads scrupulously clean.

And here’s how it looks on a bed

Not a bad project for Modest Machine to limber up after the lay off.  And now I have officially queen and twin sized quilts under my belt.  I do take commissions, and if you’d like to know more, leave a comment and I’ll get back.  Caio for now!

Back to the lab again.  MFC is for my mother-in-law, who asked me for a bedspread to match the color in her bedroom curtains.  She gave me a swatch of her curtains, which remains my steady guide.  A little later she  gave me a page from a LL Bean catalog with a picture of a quilt.

Here are some colors/fabrics I'm starting with, matched to the Forest Swatch near the center of the pic.

The catalog quilt was based on triangles, giving me the notion she might like something along those lines.  I looked back at some other quilts I’ve made for ideas.  This one came to mind:

Flying Geese variation, made 2008 or so, 30 x 30. At least two fabrics are former shirts from my boys, the rest thrift store p.j.'s and shirts.

I am thinking of using this as the basic block.   I started cutting and placing triangles, ending up with this:

Hmm … the green floral in two of the center squares and along the borders (a William Morris print from an old skirt of mine) takes the place of the dark brown from the finished quilt above.  But I don’t have enough of this fabric for a larger quilt which would require many more blocks.  A trip to Salvation Army produces a teal wool skirt, which is cut on the bias.  Note to self:  if you want to proceed relatively quickly, stay with fabric cut on the warp and weft.

Fabrics are woven with threads that interweave at a 90 degree angle. You cut vertically or horizontally to keep the fabric strong. If you cut at at 45 degree angle-bisecting the "warp and weft," this is "the bias," and it results in a stretchier, flouncier feel to the fabric.

I cut up enough to swap them for the floral and do like the resulting contrast around the perimeter:

How about if I completely replace the florals with the solid….

Hmm again.  Makes a good contrast, but the green is a little flat to have so much.  Either way I slice it, I will need a lot more than this skirt will provide.  Another swing by the thrift shop yields these:

These are all cotton Liz Clairborne, a courser fabric than the wool, but will provide, I hope, enough triangles.

In an earlier post I referred to “stripping the carcass.”  Here’s an illustration:

Why does this picture make me want to jump on a horse?

Now I’ve got enough greens.  My plan is to repeat this “block” 12 times, resulting in a quilt top close to the size of a queen-sized blanket.  This means a lot of cutting.  I use a rotary cutter, which makes the process a little faster, but it is still a bit tedious, and, if one is not completely careful, can result in injury.  But that’s a story for another day.

Let me finish with a reward to those of  you who’ve made it to the end:

Here's the maple transplant, settling in nicely. Now if I just had a little more sun in this yard.